Hey everyone, welcome to our recipe site, if you're looking for Easy Ramen Jiro at Home recipe, look no further! We provide you only the perfect Easy Ramen Jiro at Home recipe here. We also have wide variety of recipes to try.
Before you jump to Easy Ramen Jiro at Home recipe, you may want to read this short interesting healthy tips about Tips For Living Green And Lowering costs In The Kitchen.
Remember when the only individuals who cared about the natural environment were tree huggers as well as hippies? That’s a thing of the past now, with all people being aware of the problems besetting the planet and the shared burden we have for turning things around. The experts are agreed that we are unable to adjust things for the better without everyone’s active participation. These kinds of modifications need to start taking place, and each individual family needs to become more environmentally friendly. Read on for some methods to go green and save energy, largely in the kitchen.
Changing light bulbs is as good an area to start as any. Accomplish this for your house, not only the kitchen. The usual light bulbs are the incandescent style, which really should be replaced with compact fluorescent lightbulbs, which save energy. These bulbs are energy-efficient which means electricity consumption is definitely lower, and, while they cost a bit more to buy, will outlast an incandescent light ten times over. One of the advantages is that for every one of these lightbulbs used, it means that approximately ten normal lightbulbs less will certainly end up at a landfill site. You also have to get the habit of turning off the lights when there is nobody in a area. The kitchen lights specifically will often be left on the entire day, just because the family tends to spend a lot of time there. And it’s not restricted to the kitchen, it takes place in other parts of the house at the same time. Try keeping the lights off if you don’t absolutely need them, and notice just how much electricity you can save.
As you can see, there are many little things that you can do to save energy, as well as save money, in the kitchen alone. Environmentally friendly living is not that tough. Mostly, all it requires is a little bit of common sense.
We hope you got insight from reading it, now let’s go back to easy ramen jiro at home recipe. To cook easy ramen jiro at home you need 24 ingredients and 22 steps. Here is how you do it.
The ingredients needed to prepare Easy Ramen Jiro at Home:
- You need For making ramen noodles (1portion 250 g x 3)
- Use 185 grams x 3 Strong bread flour
- Use 65 ml x 3 Water (35 % to flour)
- Use 3 grams x 3 Bicarbonate of soda (baking soda)
- Get For making ramen soup
- Prepare 1 whole~ Chicken carcass
- Prepare 2000 ml~ Water
- Get 1 clove Garlic
- Prepare 1 thin slice Ginger
- Get 25 grams Core leaves of cabbage
- Use 300 grams Pork
- Get 140 grams~ Pork back fat
- You need For making seasoning base for the soup
- Prepare 350 ml Soy sauce
- Take 100 ml Sake
- Prepare 50 ml Mirin-style seasoning
- Use 3 grams Salt
- Take Toppings:
- Prepare 300 grams plus Pork block
- Use 1 to 2 leaves Cabbage
- You need 5 packets plus Bean sprouts
- Prepare 1 Shredded garlic
- You need You must need this for recreating Ramen Jiro!
- Prepare 1/2 tsp for each bowl Umami seasoning
Steps to make Easy Ramen Jiro at Home:
- Make ramen noodles with the ingredients above. Using only strong flour will allow you to handle the dough easily, even with this low water content. You could also buy ramen noodles.
- I don't add salt, so there's no need to let the noodles rest before using. After cutting the noodles, use straight away.
- After draining the blood, boil the chicken carcass quickly in water (not listed). Trim off unnecessary bits.
- Put the prepared chicken in a pot and cover with water. Bring to the boil and continue to cook for 20 minutes. Skim off scum and chicken fat.
- Take out the chicken carcass from the pot and discard as much meat and fat as possible. Put back the carcass to the pot, add the soup vegetables and bring back to a boil.
- I add a little more garlic and ginger than my usual recipe to hide gaminess of chicken.
- For making this soup, I need just chicken bones, really. If you have leftover bones from fried chicken or hot pot, they are good enough to make soup. In this case, use less garlic and ginger.
- This is resultant soup after cooking in a pressure cooker for 90 minutes. If the gaminess of the chicken flavor bothers you, add more garlic.
- This is the pork for enhancing the soup flavor. This pork is just for giving the umami to the soup, so use cheap cut.
- This pork is for topping. I use a pork block in a net like this because it was on sale. Use any part of pork you like.
- Add both pork and half of pork back fat to the soup and bring to a boil. Cooking time depends on the size of pork.
- After cooking the pork, take it out of the soup. If the soup has reduced too much, add water.
- Break down the cooked pork back fat into small pieces and put back to the soup with the pork for the soup. Put the rest of the pork back fat for topping.
- Cook in a pressure cooker for 45 minutes. When the back fat for topping is tender, the soup is ready.
- Marinate the pork for topping in the mixed seasoning base for the soup. This base has quite strong soy sauce taste.
- After the marinating the pork for a while, take out the pork from the seasoning base. Transfer the seasoning base to a clean container.
- This is the pork for making soup. After cooking, the pork doesn't have any flavour left. You can use this for making curry dish or soboro, maybe?
- I normally use 120 ml of seasoning base for an individual bowl. Put 90 ml in the bottom of a bowl and use the rest 30 ml for drizzling on top. This is an estimate, so use to your liking.
- I normally use 300 ml of soup for an individual bowl. You can obtain 1500 ml of soup with the ingredients above.
- Start to cook the topping vegetable just before serving. Put the vegetables in the boiling soup to cook.
- You need just one minute or so to cook noodles with this thickness. Finish all the preparation before cooking the noodles.
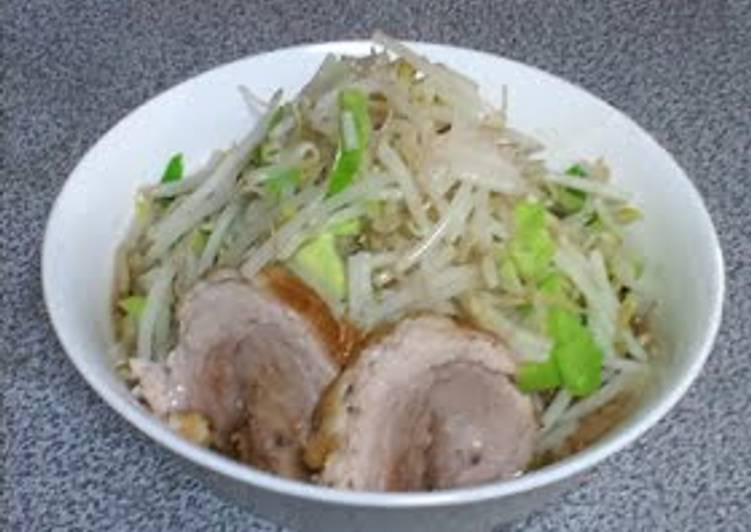
- This is ready to serve! Add more toppings such as grated garlic if you like.
If you find this Easy Ramen Jiro at Home recipe useful please share it to your friends or family, thank you and good luck.